How can hack Yahoo id via Spy ware

It is the easiest way to hack anyone's Yahoo ID's Password.

Follow these steps to hack the Yahoo ID

1. U have to make a server {spyware} given ur email id.

2. Send the server to the victim's computer anyhow.

3. When he will open it he cant realize that it was a spyware because after opening it, it will be deleted automatically.

4. After open this file, when he will go to login int his yahoo id his password and id will be send to ur given yahoo email id .


5. U can also disable his OS's many features .

There are three types of software by which u can make your own spyware {server]
U can download anyone and use it.

Files:

1. Y-Jacked
2. SH-Yahoo pass sender.
3. Yahoo Hack.

Create n Make @att.net ID Yahoo (Free)

Create n Make @att.net ID Yahoo (How To)

After gave you four tricks making Unique Yahoo ID, It is time to add other unique Yahoo ID Trick in this blog. I plan to write at least 2 or 3 more Tutorial How to make unique Yahoo Messenger ID. Now I will give you a step to make @att.net Yahoo ID. Just like making yahoo cn, btinternet, y7mail, and 9you yahoo ID, making att.net ID also need to find the correct url address registration att.net page. Your name or company will be like yourid@att.net. Just follow link bellow to open att.net registration ID Page:

Click here to Create @att.net Yahoo ID

You will see a page of att.net registration page look like this:

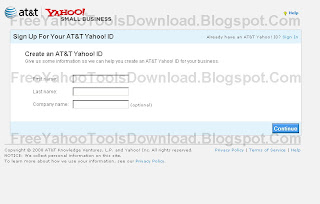
Step 1 Creating att.net Yahoo Id
Just type your First Name and Your Last name in the box at att step 1 registration page. If you want to add your company name, you can type at the box below the last name, but it is only optional that mean it is not necessary. Click yellow button "continue" in the bottom right of att.net registration page. Now you will see a page like this:

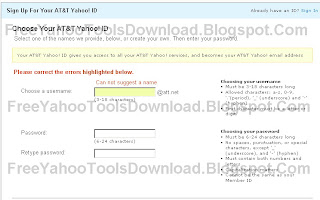
Step 2 Creating att.net Yahoo ID Picture 1
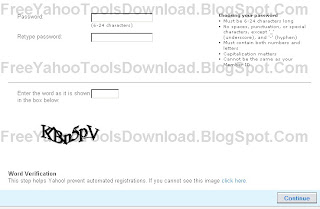
Fill the box need to filled. Your username, your password, and then continue to add verification code text. See the picture below:

Step 2 Creating att.net Yahoo ID Picture 2
Then just continue your step until your registration name or ID or username of att.net Yahoo ID finished. Enjoy your new ID.

End of Trick

If you have any problem in making id contact me 

Use free internet on Telenor Pakistan


AB TELENOR SIM PER FREE INTERNET USE KARAIN BILKUL FREE
APNAY MOBILE MAIN YE SETTING KARAIN.
MOBILE SETTINGS
Conection Name : TELENOR FREE
DATA BEARER : GPRS
PROXEY : ENABLE
ACESS POINT : mms
IP ADDRESS : 172.18.19.11  PORT : 8080
User name : telenor
Prompt Password : no
Pasword : telenor
Authentication : normal
Homepage :
PC SETTINGS
Conect ur Phone with ur PC via cable or blutooth..
a modem will be installed as per your connection
go to Control Panel => Phone and Modem Options => Modems > Click on the installed modem
click on it and click on "Properties" select tab "Advanced" write the line in extra initialization command.. AT+CGDCONT=1,"IP","mms"
click Ok.. again OK .. and close control panel..
now Create New Internet Connection Using Your Installed Modem..
ISP name: "TELENOR Free"
Dailup Number: *99#
User Name: telenor
Password: telenor
do not dail it yet.....
INTERNET EXPLORER SETTINGS
Right Click on "Internet Explorer" => Select "Options" Select tab "Connections"
there u will see your created internet connection " telenor Free" in dailup network setting.. click on it and then
click "Setting".. click the "Proxy Server" check box..
put the below line in
Proxy server address:172.18.19.11
put "8080" in port..
then click ok...
again ok
dail ur connection "telenor Free"

PC SEttings

AGAR APE KAY PASS TELENOR KI SIM HAI TO PAHALAY APE TELENOR KI ORIGINAL SETTINGS RECEIVE KARAIN.
TYPE NEW MEAASAGE ( ALL NOKIA N73 ) AND SEND IT TO 131
AND SAVE ALL SETTINGS
THEN YOU EDIT WAP SETTINGS AND
CHANGE ONLY ( APN ) ACCESS POINT wap to mms AND SAVE IT AND THEN SETTINGS FOR YOU PC OPEN YOU MODEM PROPERTIES --> ADVANCE --->
write the line in extra initialization command.. AT+CGDCONT=1,"IP","mms" OK--> OK
AND THEN CREAT NEW CONNECTION
NAME : TELENOR FREE
USERNAME : telenor
PASSWORD : telenor
DAIL UP # : *99# OR *99***1#
AND DAIL IT

How to hack-change your Windows XP Boot Screen


HACKING THE XP BOOT SCREEN


This is a very simple trick to do if you have done the same for the logon screen and the start button. There are 2 ways to do this trick that I know about one is doing it manually and the other is using a program called bootxp. I am going to tell you the manual way to do it, but if you want to know the other way just let me know, so I can do an update to the guide. Now once you have downloaded your ntoskrnl.exe file save it a general location so that you will have easy access to it, like my folder.


Once you have ntoskrnl.exe file in an easy access folder, restart your pc into safe mode. Once into safe mode go to the folder where your files are located.


Now that you are there copy the file that you want to change your boot screen too. Once you have copied that file, hit the window key + r or type %windir%\system32 in the run command, so that folder as follows.


Once there paste your new file into the folder and overwrite the existing folder.


Now that you have your new file in the folder restart your pc as you normally would and your new boot screen should appear. You can download this bootscreen here.


ALWAYS BACKUP EVERYTHING YOU EDIT OR DELETE. I'M NOT RESPONSIBLE IF YOU MESS YOUR COMPUTER UP BY DOING THIS HACK OR ANY TYPE OF HACK. DO IT AT YOUR OWN RISK.

Image and ntoskrnl.exe files provided by www.themexp.org

or
u can go to

code:

http://www.overclockersclub.com/guides/hackxpbootscreen.php

How to Get someones ISP password, Get free internet

1.) run your telnet program:
on windows , go to START -> RUN -> "TELNET".
on linux , you should open a shell , and write telnet.
2.) then connect (on windows "connect" , on linux "open") some anonymous server , if don't have any then search for one , if you are too lame then email me now! i'll give you in the minute! note: you should connect the server mail program (port "25")!
3.) now , write the following :

mail from:[**YOUR FRIEND'S ISP WEBMASTER**]
rcpt to:[**YOUR FRIEND'S EMAIL ADRESS**]
data
Hi there [YOUR FRIEND'S NAME] , this is [NAME OF YOUR FRIEND'S ISP] support team , lately , our server had some problems with the connection and the user-password files were destroyed , a backup was then released , and it was ok.
but yesterday we found out that it is not an updated version of the file , so , it will start charging you for a larger amount of money for each our you use!
- - - - - - - - - - - - - -
To correct the problem , we have made a speical program to correct the error , all YOU have to do is email :
"[**YOUR'S FRIEND'S ISP NAME**]@GalaxyCorp.Com" and in the SUBJECT write your "user name" and "password".

note: No moeny will be returned if you don't follow our instructions!

thank you,
the support team!

4.) press enter twice and then write "."(without the "") and press ENTER!

--
now , the places you saw ** say that maybe you didn't understood it all , so i'll give you a simple example .

[**YOUR FRIEND'S ISP WEBMASTER**] - example , if your friend is connected througe AOL , then type "webmaster@aol.com" , get it?

[**YOUR FRIEND'S EMAIL ADRESS**] - example , if your friend's email is john@aol.com, then type "john@aol.com".

[YOUR FRIEND'S NAME] - if your friend is called "John" then type "John".

[NAME OF YOUR FRIEND'S ISP] - if your friend is connected through AOL(American Online) , then type "American - Online"

"[**YOUR'S FRIEND'S ISP NAME**]@GalaxyCorp.Com" - this is the hard-part , but if you are reading this , then don't worry , you're one step from the end! ..

* launch your WWW browser(MICROSOFT INTERNET EXPLORER\NETSCAPE) , and type "HTTP://www.galaxycorp.com".

* Sign there for an account , now , when they ask you what username you want, then try the closest thing to your ISP name(ex - if your friend is connected thourgh American Online[AOL] then try "aol" or "a_o_l" or "american_online" !)

* and when they ask for your email , type your Real one!!!
now continue in your normal life , and remember to read your email!
if you suddenly get a message from your friend's email adress , and the subject is "john j4o87HnzG" then , guess what , you just saved 10$ a month!

How to fix corrupted files in XP

//////////////////////////////////////////////////////////////////////////////////
// ** How to fix corrupted files in XP ** //
// ** This tutorial was writing by: SAJID ** //
//////////////////////////////////////////////////////////////////////////////////
// ** H|LLJD00 does not take any responsibility for your actions ** //
// ** H|LLJD00 takes no responsible for any damage caused by this tutorial ** //
//////////////////////////////////////////////////////////////////////////////////

** Contents **
(1) Introduction
(2) Required
(3) Actual Tutorial
(4) Copyright Notice

// Introduction //
This tutorial has been made so people that are having problems with corrupted files, can learn how to fix them easy.

// Required //
+ Windows XP operating system
+ Windows XP cd

// Right to the tutorial //
+ Place the xp cd in your cd/dvd drive
+ Go to start
+ run
+ type in 'sfc /scannow' (without the ')

Now it should all load, and fix all your corrupted file on windows XP :)


////////////////////////////////////////////////////////////////////////////////////////////////////////////////////
// ** (c) Copyright 2010 SAJID. All Rights Reserved ** //
// ** If you wish to use this tutorial on your website please leave all credit and detials as it is. Thank you ** //
////////////////////////////////////////////////////////////////////////////////////////////////////////////////////

how to edit right click menu

How To Remove and Add Right-Click Menu Items from Files and Folders
Removing Items
A lot of programs you install will add themselves to the right-click menu of your files and/or folders. And most times, you have no choice in the matter and, as a result, your right-click menu can get very long with added items you don't even use. The last person I was helping with this had a right context menu so long that the Rename option was no longer visible!
Fortunately, you can easily remove those unwanted menu items, if you know the registry values to edit. And it's not at all difficult once you know the keys responsible for the additions.

For Files, the secret lies in the "context menu handlers" under the shellex subkey for "All Files" which, in the registry, is nothing but an asterisk - like a dos wildcard, which means the values entered apply to all files. It is at the very top of the Root key, right here:

HKEY_CLASSES_ROOT\*\shellex\ContextMenuHandlers

Click the the + sign next to the ContextMenuHandlers key, to expand it.
Now you will see some of the programs that have added items to your right-click menu. Simply delete the program keys you don't want.
Yup! It's that simple. If deleting makes you uneasy, just export the key before deleting it. Or, instead of deleting the values, disable them. Simply double click the default value for the program on the right hand pane and rename the clsid value by placing a period or dash in front of it.
ie; - {b5eedee0-c06e-11cf-8c56-444553540000}
Then exit the registry, refresh, and right click a file to see if the item was removed from the menu.
Some programs - like WinZip or WinRar - will add several items to your right click menu but all of them will be removed by deleting or disabling their one context menu handler.

Note that the above key only applies to the right click menu of files.
To remove entries from the right click context menu of folders, you need to navigate to the Folder and Drive keys:

HKEY_CLASSES_ROOT\Folder\shellex\ContextMenuHandlers
HKEY_CLASSES_ROOT\Drive\shellex\ContextMenuHandlers

All you have to do is follow the same procedure as for Files - either disable or delete items you wish to remove.
Adding Items
Adding Items to the right click menu of Files and Folders is also fairly simple using the Registry. It just involves the creation of a few new keys for each item you wish to add. You edit the same keys used for removing items. Let's use Notepad as an example of an item you'd like to add to the right click menu of all your files or folders.

For folders, go to this key:
HKEY_CLASSES_ROOT\Folder
Click the + sign next to Folder and expand it so that the Shell key is visible. Right click the Shell key and choose New>Key and name the key Notepad or whatever else you'd prefer (whatever the key is named is what will appear in the right-click menu). Now right click the new key you made and create another key named Command. Then, in the right hand pane, double click "Default" and enter Notepad.exe as the value.
Exit the registry, refresh, and right click any folder. Notepad should now be on the context menu.


For files, go here again:

HKEY_CLASSES_ROOT\*
Expand the * key and see if a Shell key exists. If it does exist, follow the same procedure as for folders. If it does not exist, you'll have to create a new Shell first. Just right click the * key and choose New>Key and name it Shell. Then right click the Shell key and continue on the same way you did for adding items to the right click menu of folders.
Once done, Notepad should appear as an option in the right click menu of all your files.
Vic Ferri owns the very popular WinTips and Tricks email group. He is also in charge of the Printing Tips and Registry Tips pages at Linda's Computer Stop.

How to clear Bios info

READ EVEYTHING BEFORE YOU USE ANY METHOD LISTED BELOW

Basic BIOS password crack - works 9.9 times out of ten
This is a password hack but it clears the BIOS such that the next time you start the PC, the CMOS does not ask for any password. Now if you are able to bring the DOS prompt up, then you will be able to change the BIOS setting to the default. To clear the CMOS do the following:
Get DOS prompt and type:
DEBUG hit enter
-o 70 2e hit enter
-o 71 ff hit enter
-q hit enter
exit hit enter
Restart the computer. It works on most versions of the AWARD BIOS.


Accessing information on the hard disk
When you turn on the host machine, enter the CMOS setup menu (usually you have to press F2, or DEL, or CTRL+ALT+S during the boot sequence) and go to STANDARD CMOS SETUP, and set the channel to which you have put the hard disk as TYPE=Auto, MODE=AUTO, then SAVE & EXIT SETUP. Now you have access to the hard disk.

Standard BIOS backdoor passwords
The first, less invasive, attempt to bypass a BIOS password is to try on of these standard manufacturer's backdoor passwords:
AWARD BIOS
AWARD SW, AWARD_SW, Award SW, AWARD PW, _award, awkward, J64, j256, j262, j332, j322, 01322222, 589589, 589721, 595595, 598598, HLT, SER, SKY_FOX, aLLy, aLLY, Condo, CONCAT, TTPTHA, aPAf, HLT, KDD, ZBAAACA, ZAAADA, ZJAAADC, djonet, %øåñòü ïpîáåëîâ%, %äåâÿòü ïpîáåëîâ%
AMI BIOS
AMI, A.M.I., AMI SW, AMI_SW, BIOS, PASSWORD, HEWITT RAND, Oder
Other passwords you may try (for AMI/AWARD or other BIOSes)
LKWPETER, lkwpeter, BIOSTAR, biostar, BIOSSTAR, biosstar, ALFAROME, Syxz, Wodj
Note that the key associated to "_" in the US keyboard corresponds to "?" in some European keyboards (such as Italian and German ones), so -- for example -- you should type AWARD?SW when using those keyboards. Also remember that passwords are Case Sensitive. The last two passwords in the AWARD BIOS list are in Russian.

Flashing BIOS via software
If you have access to the computer when it's turned on, you could try one of those programs that remove the password from the BIOS, by invalidating its memory.
However, it might happen you don't have one of those programs when you have access to the computer, so you'd better learn how to do manually what they do. You can reset the BIOS to its default values using the MS-DOS tool DEBUG (type DEBUG at the command prompt. You'd better do it in pure MS-DOS mode, not from a MS-DOS shell window in Windows). Once you are in the debug environment enter the following commands:
AMI/AWARD BIOS
O 70 17
O 71 17
Q
PHOENIX BIOS
O 70 FF
O 71 17
Q
GENERIC
Invalidates CMOS RAM.
Should work on all AT motherboards
(XT motherboards don't have CMOS)
O 70 2E
O 71 FF
Q
Note that the first letter is a "O" not the number "0". The numbers which follow are two bytes in hex format.

Flashing BIOS via hardware
If you can't access the computer when it's on, and the standard backdoor passwords didn't work, you'll have to flash the BIOS via hardware. Please read the important notes at the end of this section before to try any of these methods.

Using the jumpers
The canonical way to flash the BIOS via hardware is to plug, unplug, or switch a jumper on the motherboard (for "switching a jumper" I mean that you find a jumper that joins the central pin and a side pin of a group of three pins, you should then unplug the jumper and then plug it to the central pin and to the pin on the opposite side, so if the jumper is normally on position 1-2, you have to put it on position 2-3, or vice versa). This jumper is not always located near to the BIOS, but could be anywhere on the motherboard.
To find the correct jumper you should read the motherboard's manual.
Once you've located the correct jumper, switch it (or plug or unplug it, depending from what the manual says) while the computer is turned OFF. Wait a couple of seconds then put the jumper back to its original position. In some motherboards it may happen that the computer will automatically turn itself on, after flashing the BIOS. In this case, turn it off, and put the jumper back to its original position, then turn it on again. Other motherboards require you turn the computer on for a few seconds to flash the BIOS.
If you don't have the motherboard's manual, you'll have to "brute force" it... trying out all the jumpers. In this case, try first the isolated ones (not in a group), the ones near to the BIOS, and the ones you can switch (as I explained before). If all them fail, try all the others. However, you must modify the status of only one jumper per attempt, otherwise you could damage the motherboard (since you don't know what the jumper you modified is actually meant for). If the password request screen still appear, try another one.
If after flashing the BIOS, the computer won't boot when you turn it on, turn it off, and wait some seconds before to retry.

Removing the battery
If you can't find the jumper to flash the BIOS or if such jumper doesn't exist, you can remove the battery that keeps the BIOS memory alive. It's a button-size battery somewhere on the motherboard (on elder computers the battery could be a small, typically blue, cylinder soldered to the motherboard, but usually has a jumper on its side to disconnect it, otherwise you'll have to unsolder it and then solder it back). Take it away for 15-30 minutes or more, then put it back and the data contained into the BIOS memory should be volatilized. I'd suggest you to remove it for about one hour to be sure, because if you put it back when the data aren't erased yet you'll have to wait more time, as you've never removed it. If at first it doesn't work, try to remove the battery overnight.
Important note: in laptop and notebooks you don't have to remove the computer's power batteries (which would be useless), but you should open your computer and remove the CMOS battery from the motherboard.

Short-circuiting the chip
Another way to clear the CMOS RAM is to reset it by short circuiting two pins of the BIOS chip for a few seconds. You can do that with a small piece of electric wire or with a bent paper clip. Always make sure that the computer is turned OFF before to try this operation.
Here is a list of EPROM chips that are commonly used in the BIOS industry. You may find similar chips with different names if they are compatible chips made by another brand. If you find the BIOS chip you are working on matches with one of the following you can try to short-circuit the appropriate pins. Be careful, because this operation may damage the chip.
CHIPS P82C206 (square)
Short together pins 12 and 32 (the first and the last pins on the bottom edge of the chip) or pins 74 and 75 (the two pins on the upper left corner).
gnd
74
|__________________
5v 75--| |
| |
| |
| CHIPS |
1 * | |
| P82C206 |
| |
| |
|___________________|
| |
| gnd | 5v
12 32
OPTi F82C206 (rectangular)
Short together pins 3 and 26 (third pin from left side and fifth pin from right side on the bottom edge).
80 51
|______________|
81 -| |- 50
| |
| |
| OPTi |
| |
| F82C206 |
| |
100-|________________|-31
|| | |
1 || | | 30
3 26

Dallas DS1287, DS1287A
Benchmarq bp3287MT, bq3287AMT
The Dallas DS1287 and DS1287A, and the compatible Benchmarq bp3287MT and bq3287AMT chips have a built-in battery. This battery should last up to ten years. Any motherboard using these chips should not have an additional battery (this means you can't flash the BIOS by removing a battery). When the battery fails, the RTC chip would be replaced.
CMOS RAM can be cleared on the 1287A and 3287AMT chips by shorting pins 12 and 21.
The 1287 (and 3287MT) differ from the 1287A in that the CMOS RAM can't be cleared. If there is a problem such as a forgotten password, the chip must be replaced. (In this case it is recommended to replace the 1287 with a 1287A). Also the Dallas 12887 and 12887A are similar but contain twice as much CMOS RAM storage.
__________
1 -| * U |- 24 5v
2 -| |- 23
3 -| |- 22
4 -| |- 21 RCL (RAM Clear)
5 -| |- 20
6 -| |- 19
7 -| |- 18
8 -| |- 17
9 -| |- 16
10 -| |- 15
11 -| |- 14
gnd 12 -|__________|- 13

NOTE: Although these are 24-pin chips,
the Dallas chips may be missing 5 pins,
these are unused pins.
Most chips have unused pins,
though usually they are still present.

Dallas DS12885S
Benchmarq bq3258S
Hitachi HD146818AP
Samsung KS82C6818A
This is a rectangular 24-pin DIP chip, usually in a socket. The number on the chip should end in 6818.
Although this chip is pin-compatible with the Dallas 1287/1287A, there is no built-in battery.
Short together pins 12 and 24.
5v
24 20 13
|___________|____________________|
| |
| DALLAS |
|> |
| DS12885S |
| |
|__________________________________|
| |
1 12
gnd

Motorola MC146818AP
Short pins 12 and 24. These are the pins on diagonally opposite corners - lower left and upper right. You might also try pins 12 and 20.
__________
1 -| * U |- 24 5v
2 -| |- 23
3 -| |- 22
4 -| |- 21
5 -| |- 20
6 -| |- 19
7 -| |- 18
8 -| |- 17
9 -| |- 16
10 -| |- 15
11 -| |- 14
gnd 12 -|__________|- 13

Replacing the chip
If nothing works, you could replace the existing BIOS chip with a new one you can buy from your specialized electronic shop or your computer supplier. It's a quick operation if the chip is inserted on a base and not soldered to the motherboard, otherwise you'll have to unsolder it and then put the new one. In this case would be more convenient to solder a base on which you'll then plug the new chip, in the eventuality that you'll have to change it again. If you can't find the BIOS chip specifically made for your motherboard, you should buy one of the same type (probably one of the ones shown above) and look in your motherboard manufacturer's website to see if there's the BIOS image to download. Then you should copy that image on the chip you bought with an EPROM programmer.

Important
Whether is the method you use, when you flash the BIOS not only the password, but also all the other configuration data will be reset to the factory defaults, so when you are booting for the first time after a BIOS flash, you should enter the CMOS configuration menu (as explained before) and fix up some things.
Also, when you boot Windows, it may happen that it finds some new device, because of the new configuration of the BIOS, in this case you'll probably need the Windows installation CD because Windows may ask you for some external files. If Windows doesn't see the CD-ROM try to eject and re-insert the CD-ROM again. If Windows can't find the CD-ROM drive and you set it properly from the BIOS config, just reboot with the reset key, and in the next run Windows should find it. However most files needed by the system while installing new hardware could also be found in C:WINDOWS, C:WINDOWSSYSTEM, or C:WINDOWSINF .

Key Disk for Toshiba laptops
Some Toshiba notebooks allow to bypass BIOS by inserting a "key-disk" in the floppy disk drive while booting. To create a Toshiba Keydisk, take a 720Kb or 1.44Mb floppy disk, format it (if it's not formatted yet), then use a hex editor such as Hex Workshop (***.bpsoft.com/downloads/index.html) to change the first five bytes of the second sector (the one after the boot sector) and set them to 4B 45 59 00 00 (note that the first three bytes are the ASCII for "KEY" followed by two zeroes). Once you have created the key disk put it into the notebook's drive and turn it on, then push the reset button and when asked for password, press Enter. You will be asked to Set Password again. Press Y and Enter. You'll enter the BIOS configuration where you can set a new password.


Key protected cases
A final note about those old computers (up to 486 and early Pentiums) protected with a key that prevented the use of the mouse and the keyboard or the power button. All you have to do with them is to follow the wires connected to the key hole, locate the jumper to which they are connected and unplug it.
How To Change Thumbnail Size And Quality

If any of you out there like to use the thumbnail view, especially for browsing through photos and images, it can become a bit of a drain on your system. It is possible to lower the thumbnail size and quality by editing the following registry keys.

Open the registry and navigate to :

HKEY_CURRENT_USER\ Software\ Microsoft \ Windows\ CurrentVersion\ Explorer

Create a new DWORD value called ThumbnailSize, and set the value between 32 and 256.

And/or create another DWORD value called ThumbnailQuality, and set the value between 50 and 100.

Key Details :

USER Key: [HKEY_CURRENT_USER\ Software\ Microsoft \ Windows\ CurrentVersion\ Explorer]
Value Name: ThumbnailSize
Data Type: REG_DWORD (DWORD Value)
Data Value: 32 - 256

USER Key: [HKEY_CURRENT_USER\ Software\ Microsoft \ Windows\ CurrentVersion\ Explorer]
Value Name: ThumbnailQuality
Data Type: REG_DWORD (DWORD Value)
Data Value: 50 - 100

HOW TO BLOCK PEOPLE ON WINMX WHO SHARE NOTHING

Some people seem to think our network is a kind of a store a they just pick what they want without sharing anything!
(and other considere our net as a schoolyard where one "trade"... Childish!)

*********************

You can help everybody getting rid of them by boycotting them that way:

You "browse" each uploading user.


** If he/she shares more than, say, a hundred files (and NOT in the WinMx directory only, putting them elsewhere and unshared when entirely downloaded !!!), OK.
NB: a hundred is not a lot but 1- we don't all have a large HDD and some files are big 2- when you begin...!
** If not:

You can send a message to him/her to ask why there is no real share, or not at all, for they can have forgotten to do so: give them a chance! The first time, I didn't understand that I had to choose the shared files types, so I shared nothing, unwillingly. Somebody told it to me in a message.

If no answer and/or still no shared file, you can exclude the selfish beast:
(Thanks to dwhite who gave the modus operandi on the WinMx net)

To block somebody from downloading, add the name to your HOTLIST (right-click the name then "Add to hotlist") then to your IGNORE list.

You won't receive any messages nor will they enter your queue, during that session at least.

********************

On the contrary, you can help people who share a lot by starting the tranfer when they are in your queue, or give a higher bandwith priority...

Hide Drives and Partitions

Do you have data on a partition or hard drive that you don't want tampered with or easily accessible to other users? Well, you can hide any drive/partition in Windows XP, NT, and 2000. That means that they won't show up in Explorer or My Computer.

If you want access to that drive from your user account you should create a desktop shortcut before proceeding. Once hidden, you can still access by typing the drive letter and a colon in Start/Run—for example, "D:" will bring up a folder of the contents on your D drive.

The easiest way with Win XP is to use the TweakUI power toy from Mcft. Go to Start/Run and type in "tweakui" (without the quotes).

Go to My Computer/Drives and uncheck the drive/partition(s) you want hidden. Click "Apply" or "OK" when finished.

If you have XP but not Tweak UI you can download it here...
http://www.Mcft.com/windowsxp/downloads/powertoys/xppowertoys.mspx

For Win NT, 2000, and XP you can use the following Registry edit:

*Be sure to back up the Registry before proceeding
http://www.worldstart.com/tips/tips.php/401

Open the Registry Editor by going to Start/Run and typing in "regedit" (without the quotes). Find your way to...

HKEY_CURRENT_USER\Software\Mcft\Windows\CurrentVersion\Policies

Click on "Explorer".

Double-click the "NoDrives" key in the right column. If you don't find a "NoDrives" registry key, just right-click in the right pane and choose "New/DWORD Value" then name the key "NoDrives".

You'll see a value like "0000 00 00 00 00". This is where the fun starts. The four sets of double zeros (after the "0000") are where you'll enter the values for the drive/partitions. Now, stay with me on this—it's not as complicated as it sounds:

The first column is for drives A-H, the second for I-P, the third for Q-X, and the fourth for Y-Z.

The values for each drive are as follows:

1 - A I Q Y
2 - B J R Z
4 - C K S
8 - D L T
16 - E M U
32 - F N V
64 - G O W
80 - H P X

So, let's say you want to hide drive D. In the first column you would put "08". For drive K you would put "04" in the second column.

But what if you want to hide more than one drive in a column? Simply add the values together: D+E = 8+16 = 24. So in the first column you would put "24".

Still baffled? If you have XP then go get TweakUI and save yourself the math.

Whichever method you use, you can rest easy knowing that the files on that drive or partition are less accessible to other users.

Free World Dialup

Free World Dialup - http://www.freeworlddialup.com/
"Use FWD to make real, free phone calls using your favorite telephone, computer or PDA and any broadband connection. Call your neighbor or a relative, next door or in another country; all with the same ease, speed, and high quality." Thanks to Jeff Pulver and his crew!

Quick summary:

1 - First, got to http://www.freeworlddialup.com and sign up to get your FWD # and password.
2 - Download http://brands.xten.net/x-litefwd/download/X-LiteFWD_Install.exe FWD/X-Lite ("self-configures") program or go to http://www.myphonebooth.com/ to call any FWD # and U.S. toll free #s using Internet Explorer (Firefox not supported).

Quickstart Guide: http://www.freeworlddialup.com/support/quick_start_guide
FWD Xlite Configuration Guide: http://www.freeworlddialup.com/support/configuration_guide/configure_your_fwd_certified_phone/fwd_xlite/all
MS Windows Messenger Configuration Guide: http://pulver.com/fwd/fwd30news.html#messenger (FWD supports Windows Messenger 4.6/4.7 but not MSN Messenger 5.x.)

3 - To call a U.S. landline/cell #, dial *+arecode+7digit#. (This FWD feature is not listed on their website, but has been working for several months now.)

4 - To call a FWD # from a PSTN (your regular phone), click
http://www.dslreports.com/r0/download/476274~3ccc4c9edbe2a596714a4fd9da897204/fwdaccessnumbers.zip or after you've signed up go to FWD web page, click on "Features", "Access #s" for a list of FWD access numbers in your area. Available in several states in the U.S., UK, NL and DE at this time.

Packet8:
-- To call a P8 phone # from a FWD phone: Dial **898 + 1 + P8 number to be routed to P8 service.
-- To call a FWD # from a P8 phone:
*If the FWD # you are calling contains 5 digits, start to dial with the prefix 0351. For example: 035112345
*If the FWD # you are calling contains 6 digits, start to dial with the prefix 0451.

Call UK:
Get a UK telephone # that will call you on your FWD #. Register http://fwd.calluk.com.

FWD Features: Some features like Voice email needs to be activated at http://www.fwdnet.net

Internet Calling
Call Waiting
CallerID
Missed Call notification
Call Forwarding
Call Transfer
Three Way Calling
Voice email
SoftPhone, IP Phones & *Web-based
Aliases
Whitepages directory
ENUM Entry
eDial SOAP
Conferencing
Instant Messaging
Web Calling/FWD-Talk
Corporate Cisco Call Manager Connection
Calling to Toll Free Numbers in the UK, US, NL, JP and FR TellMe Service (411).
-- NL Dial *31(800)... to reach Netherlands toll free #s.
-- UK Dial *44(800)... or *44(808)... or *44 (500) to reach UK toll free #s.
-- US Dial *1(8xx) xxx xxxx to reach United States toll free #s.
-- JP Dial *81 0120... to reach Japan toll free #s.

Frequently used numbers
613 Echo test
55555 Volunteer Welcome Line
514 FWD Coffee House
612 Time
411 TellMe Information
611 Part Time Technical support
511 FWD Conference Bridge

At the moment, I think this is way better than Skype, Yahoo IM voice chat, etc...I've been using FWD for over a year with my cable broadband service and didn't have to set up any port forwarding on my broadband router. Obviously you'ld need a mic/speakers connected to your PC.

You can also use your regular telephone via an adapter http://voipstore.pulver.com/product_info.php?products_id=32 and IP phone http://voipstore.pulver.com/product_info.php?products_id=33. Adapters and IP phones from different vendors like Cisco are available.

* Broadbandreports.com VoIP forum (formerly known as DSLReports.com)
-- If you have any questions or just curious about VoIP, visit the VoIP forum http://www.dslreports.com/forum/voip at DSLReports.com.

Free Access To Websites Without Registering

Go to

-http://bugmenot.com/

and type the URL of the website you want to log into.
Examples:

-http://www.nytimes.com/, -http://www.winnetmag.com/
etcetera.

Another (and better) way is changing the user agent of your browser to:
Googlebot/2.1+

-http://www.googlebot.com/bot.html

This is very easy in Mozilla's Firefox. Download and install the User Agent Switcher from

-http://www.chrispederick.com/work/firefox/useragentswitcher/
and add the Googlebot user agent.

Have fun, Dead Dreamer!

-]Edit[- Now this kicks ass, was just browsing entire forum without even needing to login to view restricted areas, and it works on other sites
And no, you cant access the hidden forums either, already tried that

Disable Windows logo key

i was recently playing games and this nasty windos logo key keep annoying me , cause i often accidently clicked it , and i start to search a solution to solve my problem, and found the following article in microsfot website, and it did work, hope this helps, thanks!

CODE
http://support.microsoft.com/?kbid=181348


or in other articles, u can copy the following messages into ur notepad and save as *.reg, and use it..

Windows Registry Editor Version 5.00

[HKEY_LOCAL_MACHINE\SYSTEM\CurrentControlSet\Control\Keyboard Layout]
"Scancode Map"=hex:00,00,00,00,00,00,00,00,03,00,00,00,00,00,5b,e0,00,00,5c,e0,\
00,00,00,00

Disable DONT SEND Error

o disable the stupid feature in WinXP which tries to send a report to microsoft every time a program crashes you will have to do this:

*************************************************************************

Open Control Panel
Click on Preformance and Maintenance.
Click on System.
Then click on the Advanced tab
Click on the error reporting button on the bottom of the windows.
Select Disable error reporting.
Click OK
Click OK

*************************************************************************

Delete An "undeletable" File

Open a Command Prompt window and leave it open.
Close all open programs.
Click Start, Run and enter TASKMGR.EXE
Go to the Processes tab and End Process on Explorer.exe.
Leave Task Manager open.
Go back to the Command Prompt window and change to the directory the AVI (or other undeletable file) is located in.
At the command prompt type DEL where is the file you wish to delete.
Go back to Task Manager, click File, New Task and enter EXPLORER.EXE to restart the GUI shell.
Close Task Manager.


Or you can try this

Open Notepad.exe

Click File>Save As..>

locate the folder where ur undeletable file is

Choose 'All files' from the file type box

click once on the file u wanna delete so its name appears in the 'filename' box

put a " at the start and end of the filename
(the filename should have the extension of the undeletable file so it will overwrite it)

click save,

It should ask u to overwrite the existing file, choose yes and u can delete it as normal


Here's a manual way of doing it. I'll take this off once you put into your first post zain.

1. Start
2. Run
3. Type: command
4. To move into a directory type: cd c:\*** (The stars stand for your folder)
5. If you cannot access the folder because it has spaces for example Program Files or Kazaa Lite folder you have to do the following. instead of typing in the full folder name only take the first 6 letters then put a ~ and then 1 without spaces. Example: cd c:\progra~1\kazaal~1
6. Once your in the folder the non-deletable file it in type in dir - a list will come up with everything inside.
7. Now to delete the file type in del ***.bmp, txt, jpg, avi, etc... And if the file name has spaces you would use the special 1st 6 letters followed by a ~ and a 1 rule. Example: if your file name was bad file.bmp you would type once in the specific folder thorugh command, del badfil~1.bmp and your file should be gone. Make sure to type in the correct extension.

Create A Personal Screen Saver In Win Xp!

This isnt a tweak, but a great little feature! For a great way to put your digital photos to work, try creating a slide show presentation for use as a screen saver. Here's how:

1. Right-click an empty spot on your desktop and then click Properties.

2. Click the Screen Saver tab.

3. In the Screen saver list, click My Pictures Slideshow.

4. Click Settings to make any adjustments, such as how often the pictures should change, what size they should be, and whether you'll use transition effects between pictures, and then click OK.

Now your screen saver is a random display of the pictures taken from your My Pictures folder.

CMD Prompt here, add to folder context menu windows xp

copy what's in the code area to notepad and save as cmd here.reg

CODE

Windows Registry Editor Version 5.00

[HKEY_CLASSES_ROOT\Drive\shell\cmd]
@="Command Prompt"

[HKEY_CLASSES_ROOT\Drive\shell\cmd\command]
@="cmd.exe /k \"cd %L\""

[HKEY_CLASSES_ROOT\Directory\shell\cmd]
@="Command Prompt"

[HKEY_CLASSES_ROOT\Directory\shell\cmd\command]
@="cmd.exe /k \"cd %L\""

[HKEY_LOCAL_MACHINE\SOFTWARE\Classes\CLSID\{20D04FE0-3AEA-1069-A2D8-08002B30309D}\shell\cmd]
@="Command Prompt"

[HKEY_LOCAL_MACHINE\SOFTWARE\Classes\CLSID\{20D04FE0-3AEA-1069-A2D8-08002B30309D}\shell\cmd\command]
@="cmd.exe /k \"cd %L\""

Check For Dos, Check to see if you are infected.

When you first turn on you computer (BEFORE DIALING INTO YOUR ISP),
open a MS-DOS Prompt window (start/programs MS-DOS Prompt).
Then type netstat -arn and press the Enter key.
Your screen should display the following (without the dotted lines
which I added for clarification).

-----------------------------------------------------------------------------
Active Routes:

Network Address Netmask Gateway Address Interface Metric
127.0.0.0 255.0.0.0 127.0.0.1 127.0.0.1 1
255.255.255.255 255.255.255.255 255.255.255.255 0.0.0.0 1

Route Table

Active Connections

Proto Local Address Foreign Address State

--------------------------------------------------------------------------------

If you see anything else, there might be a problem (more on that later).
Now dial into your ISP, once you are connected;
go back to the MS-DOS Prompt and run the same command as before
netstat -arn, this time it will look similar to the following (without
dotted lines).

-------------------------------------------------------------------------------------

Active Routes:

Network Address Netmask Gateway Address Interface Metric
0.0.0.0 0.0.0.0 216.1.104.70 216.1.104.70 1
127.0.0.0 255.0.0.0 127.0.0.1 127.0.0.1 1
216.1.104.0 255.255.255.0 216.1.104.70 216.1.104.70 1
216.1.104.70 255.255.255.255 127.0.0.1 127.0.0.1 1
216.1.104.255 255.255.255.255 216.1.104.70 216.1.104.70 1
224.0.0.0 224.0.0.0 216.1.104.70 216.1.104.70 1
255.255.255.255 255.255.255.255 216.1.104.70 216.1.104.70 1

Route Table

Active Connections

Proto Local Address Foreign Address State
TCP 0.0.0.0:0 0.0.0.0:0 LISTENING
TCP 216.1.104.70:137 0.0.0.0:0 LISTENING
TCP 216.1.104.70:138 0.0.0.0:0 LISTENING
TCP 216.1.104.70:139 0.0.0.0:0 LISTENING
UDP 216.1.104.70:137 *:*

--------------------------------------------------------------------------------

What you are seeing in the first section (Active Routes) under the heading of
Network Address are some additional lines. The only ones that should be there
are ones belonging to your ISP (more on that later). In the second section
(Route Table) under Local Address you are seeing the IP address that your ISP
assigned you (in this example 216.1.104.70).

The numbers are divided into four dot notations, the first three should be
the same for both sets, while in this case the .70 is the unique number
assigned for THIS session. Next time you dial in that number will more than
likely be different.

To make sure that the first three notation are as they should be, we will run
one more command from the MS-DOS window.
From the MS-DOS Prompt type tracert /www.yourispwebsite.com or .net
or whatever it ends in. Following is an example of the output you should see.

---------------------------------------------------------------------------------------

Tracing route to /www.motion.net [207.239.117.112]over a maximum of 30 hops:
1 128 ms 2084 ms 102 ms chat-port.motion.net [216.1.104.4]
2 115 ms 188 ms 117 ms chat-core.motion.net [216.1.104.1]
3 108 ms 116 ms 119 ms www.motion.net [207.239.117.112]
Trace complete.

------------------------------------------------------------------------------------------

You will see that on lines with the 1 and 2 the first three notations of the
address match with what we saw above, which is a good thing. If it does not,
then some further investigation is needed.

If everything matches like above, you can almost breath easier. Another thing
which should you should check is programs launched during startup. To find
these, Click start/programs/startup, look at what shows up. You should be
able to recognize everything there, if not, once again more investigation is
needed.

-------------------------------------------------------------------------------------------

Now just because everything reported out like we expected (and demonstrated
above) we still are not out of the woods. How is this so, you ask? Do you use
Netmeeting? Do you get on IRC (Internet Relay Chat)? Or any other program
that makes use of the Internet. Have you every recieved an email with an
attachment that ended in .exe? The list goes on and on, basically anything
that you run could have become infected with a trojan. What this means, is
the program appears to do what you expect, but also does just a little more.
This little more could be blasting ebay.com or one of the other sites that
CNNlive was talking about.

What can you do? Well some anti-virus software will detect some trojans.
Another (tedious) thing is to start each of these "extra" Internet programs
one at a time and go through the last two steps above, looking at the routes
and connection the program uses. However, the tricky part will be figuring
out where to tracert to in order to find out if the addresses you see in
step 2 are "safe" or not. I should forewarn you, that running tracert after
tracert, after tracert might be considered "improper" by your ISP. The steps
outlined above may not work exactly as I have stated depending upon your ISP,
but with a true ISP it should work. Finally, this advise comes with NO
warranty and by following my "hints' you implicitly release me from ANY and
ALL liability which you may incur.


Other options

Display protocol statistics and current TCP/IP network connections.
Netstat [-a] [-e] [-n] [-s] [-p proto] [-r] [intervals]

-a.. Display all connections and listening ports.
-e.. Display Ethernet statistics. This may be combined with the -s option.
-n.. Diplays address and port numbers in the numerical form.
-p proto..Shows connections for the protocol specified by proto; proto may be
TCP or UDP. If used with the -s option to display per-protocol statistics,
proto may be TCP, UDP, of IP.
-r.. Display the routing table.
-s.. Display per-protocol statistics. By default, statistics are shown for TCP
UDP and IP; the -p option may be used to specify a subset of the default
interval..Redisplay selected statistics, pausing intervals seconds between each
display. If omitted. netstat will print the current configuration information
once

How To: Change Your Ip In Less Then 1 Minute

1. Click on "Start" in the bottom left hand corner of screen
2. Click on "Run"
3. Type in "command" and hit ok

You should now be at an MSDOS prompt screen.

4. Type "ipconfig /release" just like that, and hit "enter"
5. Type "exit" and leave the prompt
6. Right-click on "Network Places" or "My Network Places" on your desktop.
7. Click on "properties"

You should now be on a screen with something titled "Local Area Connection", or something close to that, and, if you have a network hooked up, all of your other networks.

8. Right click on "Local Area Connection" and click "properties"
9. Double-click on the "Internet Protocol (TCP/IP)" from the list under the "General" tab
10. Click on "Use the following IP address" under the "General" tab
11. Create an IP address (It doesn't matter what it is. I just type 1 and 2 until i fill the area up).
12. Press "Tab" and it should automatically fill in the "Subnet Mask" section with default numbers.
13. Hit the "Ok" button here
14. Hit the "Ok" button again

You should now be back to the "Local Area Connection" screen.

15. Right-click back on "Local Area Connection" and go to properties again.
16. Go back to the "TCP/IP" settings
17. This time, select "Obtain an IP address automatically"
tongue.gif 18. Hit "Ok"
19. Hit "Ok" again
20. You now have a new IP address

With a little practice, you can easily get this process down to 15 seconds.

P.S:
This only changes your dynamic IP address, not your ISP/IP address. If you plan on hacking a website with this trick be extremely careful, because if they try a little, they can trace it back

cannot use my password to get back into Windows XP

Because of the security features built into Windows XP, it is virtually impossible to get back into the system without the password.
You have several options to try and get around this problem.


If you have access to another user account with administrator rights, you can use that account to change the password
of the account that is locked out. You can also use the default Administrator account that is built into Windows XP.

First you need to boot the system into Safe Mode.
1.Restart your system.
2.When you see the blue Dell globe or screen, press the ( F8 ) key about 3 times a second.
3.You should get the Windows startup menu. Use the (Up or Down) arrow keys to highlight (SafeMode)
4.Press (Enter) on (Safe Mode), then press (Enter) on (Windows XP).
5.The system should boot to Safe Mode.

Once you are at the Account Log on Screen, click on the icon
for the user account with administrator rights, or click on the icon
for the administrators account.
Note: For Home the Administrator account isn't normally shown & in Safe Mode you have to press Ctrl+Alt+Delete keys twice to show.
For PRO you can do this in normal mode

Boot windows xp fast

Follow the following steps

1. Open notepad.exe, type "del c:\windows\prefetch\ntosboot-*.* /q" (without the quotes) & save as "ntosboot.bat" in c:\
2. From the Start menu, select "Run..." & type "gpedit.msc".
3. Double click "Windows Settings" under "Computer Configuration" and double click again on "Shutdown" in the right window.
4. In the new window, click "add", "Browse", locate your "ntosboot.bat" file & click "Open".
5. Click "OK", "Apply" & "OK" once again to exit.
6. From the Start menu, select "Run..." & type "devmgmt.msc".
7. Double click on "IDE ATA/ATAPI controllers"
8. Right click on "Primary IDE Channel" and select "Properties".
9. Select the "Advanced Settings" tab then on the device or 1 that doesn't have 'device type' greyed out select 'none' instead of 'autodetect' & click "OK".
10. Right click on "Secondary IDE channel", select "Properties" and repeat step 9.
11. Reboot your computer.

Bit Torrent Tutorials

The first things you need to know about using Bit Torrent:
-- Bit Torrent is aimed at broadband users (or any connection better than dialup).
-- Sharing is highly appreciated, and sharing is what keeps bit torrent alive.
-- A bit torrent file (*.torrent) contains information about the piece structure of the download (more on this later)
-- The method of downloading is not your conventional type of download. Since downloads do not come in as one
big chunk, you are able to download from many people at once, increasing your download speeds. There may be
100 "pieces" to a file, or 20,000+ pieces, all depending on what you're downloading. Pieces are usually small (under 200kb)
-- The speeds are based upon people sharing as they download, and seeders. Seeders are people who constantly
share in order to keep torrents alive. Usually seeders are on fast connections (10mb or higher).

In this tutorial, I will be describing it all using a bit torrent client called Azureus. This client is used to decode the .torrent files into a useable format to download from other peers. From here on out, I will refer to Bit Torrent as BT.

Which BT client you use, is purely up to you. I have tried them all, and my personal favorite is Azureus for many reasons. A big problem with most BT clients out there, is that they are extremely CPU intensive, usually using 100% of your cpu power during the whole process. This is the number one reason I use Azureus. Another, is a recently released plug-in that enables you to browse all current files listed on suprnova.org (the #1 source for torrent downloads).

Before you use the plug-in, take a look at /http://www.suprnova.org, and browse the files. Hold your mouse over the links, and you'll notice every file ends in .torrent. This is the BT file extension. Usually, .torrent files are very small, under 200kb. They contain a wealth of information about the file you want to download. A .torrent file can contain just 1 single file, or a a directory full of files and more directories. But regardless, every download is split up into hundreds or thousands of pieces. The pieces make it much easier to download at higher speeds. Back to suprnova.org. Look at the columns:

Added | Name | Filesize | Seeds | DLs (and a few more which aren't very useful.)

I'll break this down.
Added: Self explanitory, its the date the torrent was added.
Name: Also self explanitory.
Filesize: Duh
Seeds: This is how many people are strictly UPLOADING, or sharing. These people are the ones that keep .torrent files alive. By "alive", I mean, if there's no one sharing the .torrent file, no one can download.
DLs: This is how many people currently downloading that particular torrent. They also help keep the torrent alive as they share while they download.

It's always best to download using a torrent that has a decent amount of seeders and downloaders, this way you can be assured there's a good chance your download will finish. The more the better.

Now that you should understand how torrent files work, and how to use them, on to Azureus!
First, get JAVA! You need this to run Azureus, as java is what powers it. Get Java here: /http://java.sun.com/j2se/1.4.2/download.html
Next, get Azureus at: /http://azureus.sourceforge.net
Next, get the Suprnovalister plugin from /http://s93732957.onlinehome.us/storage/suprnovalister.jar

Install Java JRE before you do ANYTHING.

Install Azureus, and then in the installation folder, create 2 more folders. ./Plugins/suprnovalister (For example, if you installed Azureus to C:\PROGRAM FILES\AZUREUS, create C:\PROGRAM FILES\AZUREUS\PLUGINS\SUPRNOVALISTER). Next, put the suprnovalister.jar file that you downloaded, in that folder.

Load up Azureus, and if you want, go through the settings and personalize it.

The tab labeled "My Torrents" is the section of Azureus you need the most often. That lists all your transfers, uploads and downloads. It shows every bit of information you could possibly want to know about torrents you download.

In the menu bar, go to View > Plugins > Suprnova Lister. This will open up a new tab in Azureus. Click on "Update Mirror". This will get a mirror site of suprnova.org containing all current torrent files available. Once a mirror is grabbed, choose a category from the drop-down box to the left and click "Update". Wah-lah, all the available downloads appear in the main chart above. Just double click a download you want, and bang its starting to download. Open the "My Torrents" tab again to view and make sure your download started.

After your download has finished, be nice, and leave the torrent transferring. So people can get pieces of the file from you, just as you got pieces from other people.

Alternatively, if you don't want to use the plugin... you can just head to suprnova.org and download files to any folder. Then go to File > Open > .torrent File in Azureus.

This should about wrap it up for the Bit Torrent Tutorial. If you guys think of anything I should add, or whatnot, just let me know and I'll check into it.

Master in HARDWARE

(I'm IT, I use these codes to trouble shoot hardware issues at my job. Enjoy) cold.gif

BIOS Beep Codes

When a computer is first turned on, or rebooted, its BIOS performs a power-on self test (POST) to test the system's hardware, checking to make sure that all of the system's hardware components are working properly. Under normal circumstances, the POST will display an error message; however, if the BIOS detects an error before it can access the video card, or if there is a problem with the video card, it will produce a series of beeps, and the pattern of the beeps indicates what kind of problem the BIOS has detected.
Because there are many brands of BIOS, there are no standard beep codes for every BIOS.

The two most-used brands are AMI (American Megatrends International) and Phoenix.

Below are listed the beep codes for AMI systems, and here are the beep codes for Phoenix systems.


AMI Beep Codes

Beep Code Meaning
1 beep DRAM refresh failure. There is a problem in the system memory or the motherboard.
2 beeps Memory parity error. The parity circuit is not working properly.
3 beeps Base 64K RAM failure. There is a problem with the first 64K of system memory.
4 beeps System timer not operational. There is problem with the timer(s) that control functions on the motherboard.
5 beeps Processor failure. The system CPU has failed.
6 beeps Gate A20/keyboard controller failure. The keyboard IC controller has failed, preventing gate A20 from switching the processor to protect mode.
7 beeps Virtual mode exception error.
8 beeps Video memory error. The BIOS cannot write to the frame buffer memory on the video card.
9 beeps ROM checksum error. The BIOS ROM chip on the motherboard is likely faulty.
10 beeps CMOS checksum error. Something on the motherboard is causing an error when trying to interact with the CMOS.
11 beeps Bad cache memory. An error in the level 2 cache memory.
1 long beep, 2 short Failure in the video system.
1 long beep, 3 short A failure has been detected in memory above 64K.
1 long beep, 8 short Display test failure.
Continuous beeping A problem with the memory or video.
BIOS Beep Codes


Phoenix Beep Codes

Phoenix uses sequences of beeps to indicate problems. The "-" between each number below indicates a pause between each beep sequence. For example, 1-2-3 indicates one beep, followed by a pause and two beeps, followed by a pause and three beeps. Phoenix version before 4.x use 3-beep codes, while Phoenix versions starting with 4.x use 4-beep codes. Click here for AMI BIOS beep codes.
4-Beep Codes
Beep Code Meaning
1-1-1-3 Faulty CPU/motherboard. Verify real mode.
1-1-2-1 Faulty CPU/motherboard.
1-1-2-3 Faulty motherboard or one of its components.
1-1-3-1 Faulty motherboard or one of its components. Initialize chipset registers with initial POST values.
1-1-3-2 Faulty motherboard or one of its components.
1-1-3-3 Faulty motherboard or one of its components. Initialize CPU registers.
1-1-3-2
1-1-3-3
1-1-3-4 Failure in the first 64K of memory.
1-1-4-1 Level 2 cache error.
1-1-4-3 I/O port error.
1-2-1-1 Power management error.
1-2-1-2
1-2-1-3 Faulty motherboard or one of its components.
1-2-2-1 Keyboard controller failure.
1-2-2-3 BIOS ROM error.
1-2-3-1 System timer error.
1-2-3-3 DMA error.
1-2-4-1 IRQ controller error.
1-3-1-1 DRAM refresh error.
1-3-1-3 A20 gate failure.
1-3-2-1 Faulty motherboard or one of its components.
1-3-3-1 Extended memory error.
1-3-3-3
1-3-4-1
1-3-4-3 Error in first 1MB of system memory.
1-4-1-3
1-4-2-4 CPU error.
1-4-3-1
2-1-4-1 BIOS ROM shadow error.
1-4-3-2
1-4-3-3 Level 2 cache error.
1-4-4-1
1-4-4-2
2-1-1-1 Faulty motherboard or one of its components.
2-1-1-3
2-1-2-1 IRQ failure.
2-1-2-3 BIOS ROM error.
2-1-2-4
2-1-3-2 I/O port failure.
2-1-3-1
2-1-3-3 Video system failure.
2-1-1-3
2-1-2-1 IRQ failure.
2-1-2-3 BIOS ROM error.
2-1-2-4 I/O port failure.
2-1-4-3
2-2-1-1 Video card failure.
2-2-1-3
2-2-2-1
2-2-2-3 Keyboard controller failure.
2-2-3-1 IRQ error.
2-2-4-1 Error in first 1MB of system memory.
2-3-1-1
2-3-3-3 Extended memory failure.
2-3-2-1 Faulty motherboard or one of its components.
2-3-2-3
2-3-3-1 Level 2 cache error.
2-3-4-1
2-3-4-3 Motherboard or video card failure.
2-3-4-1
2-3-4-3
2-4-1-1 Motherboard or video card failure.
2-4-1-3 Faulty motherboard or one of its components.
2-4-2-1 RTC error.
2-4-2-3 Keyboard controller error.
2-4-4-1 IRQ error.
3-1-1-1
3-1-1-3
3-1-2-1
3-1-2-3 I/O port error.
3-1-3-1
3-1-3-3 Faulty motherboard or one of its components.
3-1-4-1
3-2-1-1
3-2-1-2 Floppy drive or hard drive failure.
3-2-1-3 Faulty motherboard or one of its components.
3-2-2-1 Keyboard controller error.
3-2-2-3
3-2-3-1
3-2-4-1 Faulty motherboard or one of its components.
3-2-4-3 IRQ error.
3-3-1-1 RTC error.
3-3-1-3 Key lock error.
3-3-3-3 Faulty motherboard or one of its components.
3-3-3-3
3-3-4-1
3-3-4-3
3-4-1-1
3-4-1-3
3-4-2-1
3-4-2-3
3-4-3-1
3-4-4-1
3-4-4-4 Faulty motherboard or one of its components.
4-1-1-1 Floppy drive or hard drive failure.
4-2-1-1
4-2-1-3
4-2-2-1 IRQ failure.
4-2-2-3
4-2-3-1
4-2-3-3
4-2-4-1 Faulty motherboard or one of its components.
4-2-4-3 Keyboard controller error.
4-3-1-3
4-3-1-4
4-3-2-1
4-3-2-2
4-3-3-1
4-3-4-1
4-3-4-3 Faulty motherboard or one of its components.
4-3-3-2
4-3-3-4 IRQ failure.
4-3-3-3
4-3-4-2 Floppy drive or hard drive failure.
3-Beep Codes
Beep Code Meaning
1-1-2 Faulty CPU/motherboard.
1-1-3 Faulty motherboard/CMOS read-write failure.
1-1-4 Faulty BIOS/BIOS ROM checksum error.
1-2-1 System timer not operational. There is a problem with the timer(s) that control functions on the motherboard.
1-2-2
1-2-3 Faulty motherboard/DMA failure.
1-3-1 Memory refresh failure.
1-3-2
1-3-3
1-3-4 Failure in the first 64K of memory.
1-4-1 Address line failure.
1-4-2 Parity RAM failure.
1-4-3 Timer failure.
1-4-4 NMI port failure.
2-_-_ Any combination of beeps after 2 indicates a failure in the first 64K of memory.
3-1-1 Master DMA failure.
3-1-2 Slave DMA failure.
3-1-3
3-1-4 Interrupt controller failure.
3-2-4 Keyboard controller failure.
3-3-1
3-3-2 CMOS error.
3-3-4 Video card failure.
3-4-1 Video card failure.
4-2-1 Timer failure.
4-2-2 CMOS shutdown failure.
4-2-3 Gate A20 failure.
4-2-4 Unexpected interrupt in protected mode.
4-3-1 RAM test failure.
4-3-3 Timer failure.
4-3-4 Time of day clock failure.
4-4-1 Serial port failure.
4-4-2 Parallel port failure.
4-4-3 Math coprocessor.

Automatic Windows Installation, No keypress required!

An unattended Windows XP/2003 install can install all your software and settings along with Windows, and without you having to click a button or press a key,completely automated. Learn how over here:

CODE

http://unattended.msfn.org


Make your unattended setup now!

23 Ways To Speed WinXP, Not only Defrag

Since defragging the disk won't do much to improve Windows XP performance, here are 23 suggestions that will. Each can enhance the performance and reliability of your customers' PCs. Best of all, most of them will cost you nothing.
1.) To decrease a system's boot time and increase system performance, use the money you save by not buying defragmentation software -- the built-in Windows defragmenter works just fine -- and instead equip the computer with an Ultra-133 or Serial ATA hard drive with 8-MB cache buffer.

2.) If a PC has less than 512 MB of RAM, add more memory. This is a relatively inexpensive and easy upgrade that can dramatically improve system performance.

3.) Ensure that Windows XP is utilizing the NTFS file system. If you're not sure, here's how to check: First, double-click the My Computer icon, right-click on the C: Drive, then select Properties. Next, examine the File System type; if it says FAT32, then back-up any important data. Next, click Start, click Run, type CMD, and then click OK. At the prompt, type CONVERT C: /FS:NTFS and press the Enter key. This process may take a while; it's important that the computer be uninterrupted and virus-free. The file system used by the bootable drive will be either FAT32 or NTFS. I highly recommend NTFS for its superior security, reliability, and efficiency with larger disk drives.

4.) Disable file indexing. The indexing service extracts information from documents and other files on the hard drive and creates a "searchable keyword index." As you can imagine, this process can be quite taxing on any system.

The idea is that the user can search for a word, phrase, or property inside a document, should they have hundreds or thousands of documents and not know the file name of the document they want. Windows XP's built-in search functionality can still perform these kinds of searches without the Indexing service. It just takes longer. The OS has to open each file at the time of the request to help find what the user is looking for.

Most people never need this feature of search. Those who do are typically in a large corporate environment where thousands of documents are located on at least one server. But if you're a typical system builder, most of your clients are small and medium businesses. And if your clients have no need for this search feature, I recommend disabling it.

Here's how: First, double-click the My Computer icon. Next, right-click on the C: Drive, then select Properties. Uncheck "Allow Indexing Service to index this disk for fast file searching." Next, apply changes to "C: subfolders and files," and click OK. If a warning or error message appears (such as "Access is denied"), click the Ignore All button.

5.) Update the PC's video and motherboard chipset drivers. Also, update and configure the BIOS. For more information on how to configure your BIOS properly, see this article on my site.

6.) Empty the Windows Prefetch folder every three months or so. Windows XP can "prefetch" portions of data and applications that are used frequently. This makes processes appear to load faster when called upon by the user. That's fine. But over time, the prefetch folder may become overloaded with references to files and applications no longer in use. When that happens, Windows XP is wasting time, and slowing system performance, by pre-loading them. Nothing critical is in this folder, and the entire contents are safe to delete.

7.) Once a month, run a disk cleanup. Here's how: Double-click the My Computer icon. Then right-click on the C: drive and select Properties. Click the Disk Cleanup button -- it's just to the right of the Capacity pie graph -- and delete all temporary files.

8.) In your Device Manager, double-click on the IDE ATA/ATAPI Controllers device, and ensure that DMA is enabled for each drive you have connected to the Primary and Secondary controller. Do this by double-clicking on Primary IDE Channel. Then click the Advanced Settings tab. Ensure the Transfer Mode is set to "DMA if available" for both Device 0 and Device 1. Then repeat this process with the Secondary IDE Channel.

9.) Upgrade the cabling. As hard-drive technology improves, the cabling requirements to achieve these performance boosts have become more stringent. Be sure to use 80-wire Ultra-133 cables on all of your IDE devices with the connectors properly assigned to the matching Master/Slave/Motherboard sockets. A single device must be at the end of the cable; connecting a single drive to the middle connector on a ribbon cable will cause signaling problems. With Ultra DMA hard drives, these signaling problems will prevent the drive from performing at its maximum potential. Also, because these cables inherently support "cable select," the location of each drive on the cable is important. For these reasons, the cable is designed so drive positioning is explicitly clear.

10.) Remove all spyware from the computer. Use free programs such as AdAware by Lavasoft or SpyBot Search & Destroy. Once these programs are installed, be sure to check for and download any updates before starting your search. Anything either program finds can be safely removed. Any free software that requires spyware to run will no longer function once the spyware portion has been removed; if your customer really wants the program even though it contains spyware, simply reinstall it. For more information on removing Spyware visit this Web Pro News page.

11.) Remove any unnecessary programs and/or items from Windows Startup routine using the MSCONFIG utility. Here's how: First, click Start, click Run, type MSCONFIG, and click OK. Click the StartUp tab, then uncheck any items you don't want to start when Windows starts. Unsure what some items are? Visit the WinTasks Process Library. It contains known system processes, applications, as well as spyware references and explanations. Or quickly identify them by searching for the filenames using Google or another Web search engine.

12.) Remove any unnecessary or unused programs from the Add/Remove Programs section of the Control Panel.

13.) Turn off any and all unnecessary animations, and disable active desktop. In fact, for optimal performance, turn off all animations. Windows XP offers many different settings in this area. Here's how to do it: First click on the System icon in the Control Panel. Next, click on the Advanced tab. Select the Settings button located under Performance. Feel free to play around with the options offered here, as nothing you can change will alter the reliability of the computer -- only its responsiveness.

14.) If your customer is an advanced user who is comfortable editing their registry, try some of the performance registry tweaks offered at Tweak XP.

15.) Visit Microsoft's Windows update site regularly, and download all updates labeled Critical. Download any optional updates at your discretion.

16.) Update the customer's anti-virus software on a weekly, even daily, basis. Make sure they have only one anti-virus software package installed. Mixing anti-virus software is a sure way to spell disaster for performance and reliability.

17.) Make sure the customer has fewer than 500 type fonts installed on their computer. The more fonts they have, the slower the system will become. While Windows XP handles fonts much more efficiently than did the previous versions of Windows, too many fonts -- that is, anything over 500 -- will noticeably tax the system.

18.) Do not partition the hard drive. Windows XP's NTFS file system runs more efficiently on one large partition. The data is no safer on a separate partition, and a reformat is never necessary to reinstall an operating system. The same excuses people offer for using partitions apply to using a folder instead. For example, instead of putting all your data on the D: drive, put it in a folder called "D drive." You'll achieve the same organizational benefits that a separate partition offers, but without the degradation in system performance. Also, your free space won't be limited by the size of the partition; instead, it will be limited by the size of the entire hard drive. This means you won't need to resize any partitions, ever. That task can be time-consuming and also can result in lost data.

19.) Check the system's RAM to ensure it is operating properly. I recommend using a free program called MemTest86. The download will make a bootable CD or diskette (your choice), which will run 10 extensive tests on the PC's memory automatically after you boot to the disk you created. Allow all tests to run until at least three passes of the 10 tests are completed. If the program encounters any errors, turn off and unplug the computer, remove a stick of memory (assuming you have more than one), and run the test again. Remember, bad memory cannot be repaired, but only replaced.

20.) If the PC has a CD or DVD recorder, check the drive manufacturer's Web site for updated firmware. In some cases you'll be able to upgrade the recorder to a faster speed. Best of all, it's free.

21.) Disable unnecessary services. Windows XP loads a lot of services that your customer most likely does not need. To determine which services you can disable for your client, visit the Black Viper site for Windows XP configurations.

22.) If you're sick of a single Windows Explorer window crashing and then taking the rest of your OS down with it, then follow this tip: open My Computer, click on Tools, then Folder Options. Now click on the View tab. Scroll down to "Launch folder windows in a separate process," and enable this option. You'll have to reboot your machine for this option to take effect.

23.)
At least once a year, open the computer's cases and blow out all the dust and debris. While you're in there, check that all the fans are turning properly. Also inspect the motherboard capacitors for bulging or leaks. For more information on this leaking-capacitor phenomena, you can read numerous articles on my site.


Following any of these suggestions should result in noticeable improvements to the performance and reliability of your customers' computers. If you still want to defrag a disk, remember that the main benefit will be to make your data more retrievable in the event of a crashed drive.

10 Fast and Free Security Enhancements

Before you spend a dime on security, there are many precautions you can take that will protect you against the most common threats.

1. Check Windows Update and Office Update regularly (_http://office.microsoft.com/productupdates); have your Office CD ready. Windows Me, 2000, and XP users can configure automatic updates. Click on the Automatic Updates tab in the System control panel and choose the appropriate options.

2. Install a personal firewall. Both SyGate (_www.sygate.com) and ZoneAlarm (_www.zonelabs.com) offer free versions.


3. Install a free spyware blocker. Our Editors' Choice ("Spyware," April 22) was SpyBot Search & Destroy (_http://security.kolla.de). SpyBot is also paranoid and ruthless in hunting out tracking cookies.

4. Block pop-up spam messages in Windows NT, 2000, or XP by disabling the Windows Messenger service (this is unrelated to the instant messaging program). Open Control Panel | Administrative Tools | Services and you'll see Messenger. Right-click and go to Properties. Set Start-up Type to Disabled and press the Stop button. Bye-bye, spam pop-ups! Any good firewall will also stop them.

5. Use strong passwords and change them periodically. Passwords should have at least seven characters; use letters and numbers and have at least one symbol. A decent example would be f8izKro@l. This will make it much harder for anyone to gain access to your accounts.

6. If you're using Outlook or Outlook Express, use the current version or one with the Outlook Security Update installed. The update and current versions patch numerous vulnerabilities.

7. Buy antivirus software and keep it up to date. If you're not willing to pay, try Grisoft AVG Free Edition (Grisoft Inc., w*w.grisoft.com). And doublecheck your AV with the free, online-only scanners available at w*w.pandasoftware.com/activescan and _http://housecall.trendmicro.com.

8. If you have a wireless network, turn on the security features: Use MAC filtering, turn off SSID broadcast, and even use WEP with the biggest key you can get. For more, check out our wireless section or see the expanded coverage in Your Unwired World in our next issue.

9. Join a respectable e-mail security list, such as the one found at our own Security Supersite at _http://security.ziffdavis.com, so that you learn about emerging threats quickly and can take proper precautions.

10. Be skeptical of things on the Internet. Don't assume that e-mail "From:" a particular person is actually from that person until you have further reason to believe it's that person. Don't assume that an attachment is what it says it is. Don't give out your password to anyone, even if that person claims to be from "support."

10 reasons why PCs crash U must Know

Fatal error: the system has become unstable or is busy," it says. "Enter to return to Windows or press Control-Alt-Delete to restart your computer. If you do this you will lose any unsaved information in all open applications."

You have just been struck by the Blue Screen of Death. Anyone who uses Mcft Windows will be familiar with this. What can you do? More importantly, how can you prevent it happening?

1 Hardware conflict

The number one reason why Windows crashes is hardware conflict. Each hardware device communicates to other devices through an interrupt request channel (IRQ). These are supposed to be unique for each device.

For example, a printer usually connects internally on IRQ 7. The keyboard usually uses IRQ 1 and the floppy disk drive IRQ 6. Each device will try to hog a single IRQ for itself.

If there are a lot of devices, or if they are not installed properly, two of them may end up sharing the same IRQ number. When the user tries to use both devices at the same time, a crash can happen. The way to check if your computer has a hardware conflict is through the following route:

* Start-Settings-Control Panel-System-Device Manager.


Often if a device has a problem a yellow '!' appears next to its description in the Device Manager. Highlight Computer (in the Device Manager) and press Properties to see the IRQ numbers used by your computer. If the IRQ number appears twice, two devices may be using it.

Sometimes a device might share an IRQ with something described as 'IRQ holder for PCI steering'. This can be ignored. The best way to fix this problem is to remove the problem device and reinstall it.

Sometimes you may have to find more recent drivers on the internet to make the device function properly. A good resource is www.driverguide.com. If the device is a soundcard, or a modem, it can often be fixed by moving it to a different slot on the motherboard (be careful about opening your computer, as you may void the warranty).

When working inside a computer you should switch it off, unplug the mains lead and touch an unpainted metal surface to discharge any static electricity.

To be fair to Mcft, the problem with IRQ numbers is not of its making. It is a legacy problem going back to the first PC designs using the IBM 8086 chip. Initially there were only eight IRQs. Today there are 16 IRQs in a PC. It is easy to run out of them. There are plans to increase the number of IRQs in future designs.

2 Bad Ram

Ram (random-access memory) problems might bring on the blue screen of death with a message saying Fatal Exception Error. A fatal error indicates a serious hardware problem. Sometimes it may mean a part is damaged and will need replacing.

But a fatal error caused by Ram might be caused by a mismatch of chips. For example, mixing 70-nanosecond (70ns) Ram with 60ns Ram will usually force the computer to run all the Ram at the slower speed. This will often crash the machine if the Ram is overworked.

One way around this problem is to enter the BIOS settings and increase the wait state of the Ram. This can make it more stable. Another way to troubleshoot a suspected Ram problem is to rearrange the Ram chips on the motherboard, or take some of them out. Then try to repeat the circumstances that caused the crash. When handling Ram try not to touch the gold connections, as they can be easily damaged.

Parity error messages also refer to Ram. Modern Ram chips are either parity (ECC) or non parity (non-ECC). It is best not to mix the two types, as this can be a cause of trouble.

EMM386 error messages refer to memory problems but may not be connected to bad Ram. This may be due to free memory problems often linked to old Dos-based programmes.

3 BIOS settings

Every motherboard is supplied with a range of chipset settings that are decided in the factory. A common way to access these settings is to press the F2 or delete button during the first few seconds of a boot-up.

Once inside the BIOS, great care should be taken. It is a good idea to write down on a piece of paper all the settings that appear on the screen. That way, if you change something and the computer becomes more unstable, you will know what settings to revert to.

A common BIOS error concerns the CAS latency. This refers to the Ram. Older EDO (extended data out) Ram has a CAS latency of 3. Newer SDRam has a CAS latency of 2. Setting the wrong figure can cause the Ram to lock up and freeze the computer's display.

Mcft Windows is better at allocating IRQ numbers than any BIOS. If possible set the IRQ numbers to Auto in the BIOS. This will allow Windows to allocate the IRQ numbers (make sure the BIOS setting for Plug and Play OS is switched to 'yes' to allow Windows to do this.).

4 Hard disk drives


After a few weeks, the information on a hard disk drive starts to become piecemeal or fragmented. It is a good idea to defragment the hard disk every week or so, to prevent the disk from causing a screen freeze. Go to

* Start-Programs-Accessories-System Tools-Disk Defragmenter

This will start the procedure. You will be unable to write data to the hard drive (to save it) while the disk is defragmenting, so it is a good idea to schedule the procedure for a period of inactivity using the Task Scheduler.

The Task Scheduler should be one of the small icons on the bottom right of the Windows opening page (the desktop).

Some lockups and screen freezes caused by hard disk problems can be solved by reducing the read-ahead optimisation. This can be adjusted by going to

* Start-Settings-Control Panel-System Icon-Performance-File System-Hard Disk.

Hard disks will slow down and crash if they are too full. Do some housekeeping on your hard drive every few months and free some space on it. Open the Windows folder on the C drive and find the Temporary Internet Files folder. Deleting the contents (not the folder) can free a lot of space.

Empty the Recycle Bin every week to free more space. Hard disk drives should be scanned every week for errors or bad sectors. Go to

* Start-Programs-Accessories-System Tools-ScanDisk

Otherwise assign the Task Scheduler to perform this operation at night when the computer is not in use.

5 Fatal OE exceptions and VXD errors

Fatal OE exception errors and VXD errors are often caused by video card problems.

These can often be resolved easily by reducing the resolution of the video display. Go to

* Start-Settings-Control Panel-Display-Settings


Here you should slide the screen area bar to the left. Take a look at the colour settings on the left of that window. For most desktops, high colour 16-bit depth is adequate.

If the screen freezes or you experience system lockups it might be due to the video card. Make sure it does not have a hardware conflict. Go to

* Start-Settings-Control Panel-System-Device Manager

Here, select the + beside Display Adapter. A line of text describing your video card should appear. Select it (make it blue) and press properties. Then select Resources and select each line in the window. Look for a message that says No Conflicts.

If you have video card hardware conflict, you will see it here. Be careful at this point and make a note of everything you do in case you make things worse.

The way to resolve a hardware conflict is to uncheck the Use Automatic Settings box and hit the Change Settings button. You are searching for a setting that will display a No Conflicts message.

Another useful way to resolve video problems is to go to

* Start-Settings-Control Panel-System-Performance-Graphics

Here you should move the Hardware Acceleration slider to the left. As ever, the most common cause of problems relating to graphics cards is old or faulty drivers (a driver is a small piece of software used by a computer to communicate with a device).

Look up your video card's manufacturer on the internet and search for the most recent drivers for it.

6 Viruses

Often the first sign of a virus infection is instability. Some viruses erase the boot sector of a hard drive, making it impossible to start. This is why it is a good idea to create a Windows start-up disk. Go to

* Start-Settings-Control Panel-Add/Remove Programs

Here, look for the Start Up Disk tab. Virus protection requires constant vigilance.

A virus scanner requires a list of virus signatures in order to be able to identify viruses. These signatures are stored in a DAT file. DAT files should be updated weekly from the website of your antivirus software manufacturer.

An excellent antivirus programme is McAfee VirusScan by Network Associates ( www.nai.com). Another is Norton AntiVirus 2000, made by Symantec ( www.symantec.com).

7 Printers

The action of sending a document to print creates a bigger file, often called a postscript file.

Printers have only a small amount of memory, called a buffer. This can be easily overloaded. Printing a document also uses a considerable amount of CPU power. This will also slow down the computer's performance.

If the printer is trying to print unusual characters, these might not be recognised, and can crash the computer. Sometimes printers will not recover from a crash because of confusion in the buffer. A good way to clear the buffer is to unplug the printer for ten seconds. Booting up from a powerless state, also called a cold boot, will restore the printer's default settings and you may be able to carry on.

8 Software

A common cause of computer crash is faulty or badly-installed software. Often the problem can be cured by uninstalling the software and then reinstalling it. Use Norton Uninstall or Uninstall Shield to remove an application from your system properly. This will also remove references to the programme in the System Registry and leaves the way clear for a completely fresh copy.

The System Registry can be corrupted by old references to obsolete software that you thought was uninstalled. Use Reg Cleaner by Jouni Vuorio to clean up the System Registry and remove obsolete entries. It works on Windows 95, Windows 98, Windows 98 SE (Second Edition), Windows Millennium Edition (ME), NT4 and Windows 2000.

Read the instructions and use it carefully so you don't do permanent damage to the Registry. If the Registry is damaged you will have to reinstall your operating system. Reg Cleaner can be obtained from www.jv16.org

Often a Windows problem can be resolved by entering Safe Mode. This can be done during start-up. When you see the message "Starting Windows" press F4. This should take you into Safe Mode.

Safe Mode loads a minimum of drivers. It allows you to find and fix problems that prevent Windows from loading properly.

Sometimes installing Windows is difficult because of unsuitable BIOS settings. If you keep getting SUWIN error messages (Windows setup) during the Windows installation, then try entering the BIOS and disabling the CPU internal cache. Try to disable the Level 2 (L2) cache if that doesn't work.

Remember to restore all the BIOS settings back to their former settings following installation.

9 Overheating

Central processing units (CPUs) are usually equipped with fans to keep them cool. If the fan fails or if the CPU gets old it may start to overheat and generate a particular kind of error called a kernel error. This is a common problem in chips that have been overclocked to operate at higher speeds than they are supposed to.

One remedy is to get a bigger better fan and install it on top of the CPU. Specialist cooling fans/heatsinks are available from www.computernerd.com or www.coolit.com

CPU problems can often be fixed by disabling the CPU internal cache in the BIOS. This will make the machine run more slowly, but it should also be more stable.

10 Power supply problems

With all the new construction going on around the country the steady supply of electricity has become disrupted. A power surge or spike can crash a computer as easily as a power cut.

If this has become a nuisance for you then consider buying a uninterrupted power supply (UPS). This will give you a clean power supply when there is electricity, and it will give you a few minutes to perform a controlled shutdown in case of a power cut.

It is a good investment if your data are critical, because a power cut will cause any unsaved data to be lost.

    About Me

    Followers